Thứ Tư, 28 tháng 1, 2015

Băng keo 3M 300LSE dán màn hình cảm ứng

Giới thiệu tới các bạn sản phẩm băng keo 2 mặt trong suốt siêu dính của 3M (3M 93015). 

Xem hình: 
H1. 

H2. 

H3. 

H4. 

H5. 
video

tham khảo: http://www.ebay.com/itm/3M-300LSE-Double-Sided-SUPER-STICKY-HEAVY-DUTY-ADHESIVE-TAPE-Cell-Phone-Repair/231178685810?_trksid=p2047675.c100005.m1851&_trkparms=aid%3D222003%26algo%3DSIC.FIT%26ao%3D1%26asc%3D22405%26meid%3D6397276764882838331%26pid%3D100005%26prg%3D8888%26rk%3D1%26rkt%3D6%26sd%3D111254669397&rt=nc

Hàng này xuất xứ từ USA
Quy cách 10mm x 55m 
Anh em mua về một cuộn làm hoài không hết. 
Sản phẩm chịu được nhiệt độ cao lên đến 150 độ C. 
theo: ĐỨC THÀNH 3M SHOP - www.vatlieucongnghiep.com 

(Vui lòng gọi đt trước để check về tình trạng hàng trước khi đến). 
Có thể đặt hàng số lượng.

3M 35 19mmx20.1m - Băng keo điện 3M 35

THÔNG TIN SẢN PHẨM
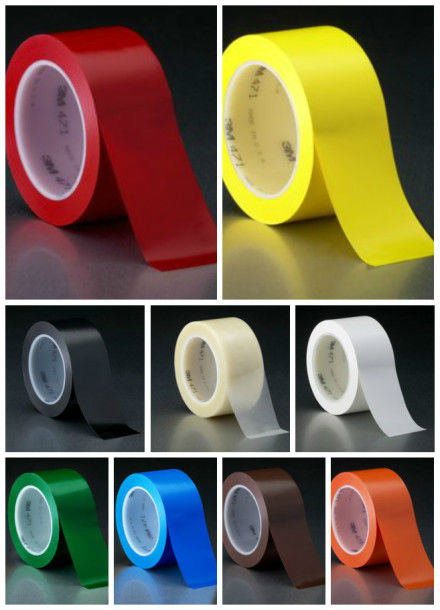
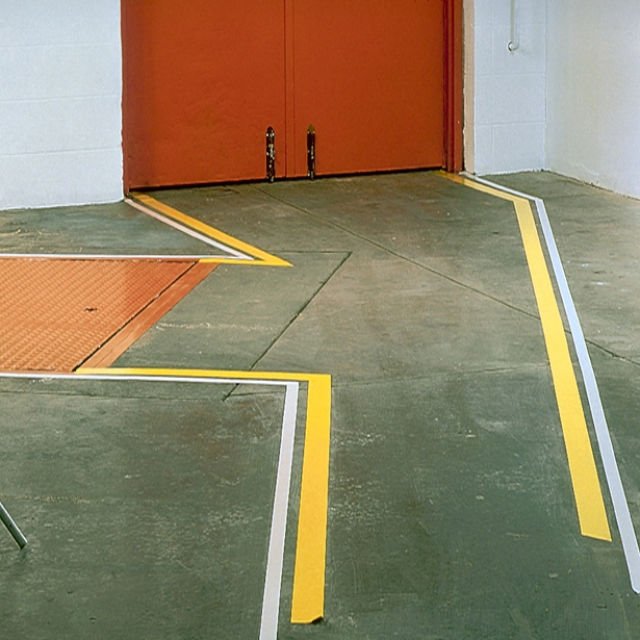
- Được làm từ chất liệu Polyvinyl Chloride và cao su tổng hợp (PVC).
- Độ dày: 0.178mm.
- Chịu được nhiệt độ từ -18°C đến 105°C.
- Thích hợp cho mọi loại thời tiết.
- Có khả năng chịu mài mòn cao, chịu được trong môi trường acid.
- Có khả năng chịu được điện thế cao (600V).
- Chống cháy.
- Có thể dùng ngoài trời và trong nhà.
- Xuất xứ: 3M USA.
sản phẩm có các màu: Xanh Lá, Vàng, Xanh Da Trời, Đỏ, Trắng (Đen: băng keo điện super 33+)
theo: ĐỨC THÀNH 3M SHOP - www.vatlieucongnghiep.com 


ĐÁNH BÓNG KIM LOẠI, INOX - AUTOSOL METAL POLISH

Xin giới thiệu tới quý khách hàng giải pháp đánh bóng kim loại, inox cho điện thoại, ipod, ipad, iphone, mô tô, xe hơi, máy móc công nghiệp, xe tải, xe kéo container,....... 
1.

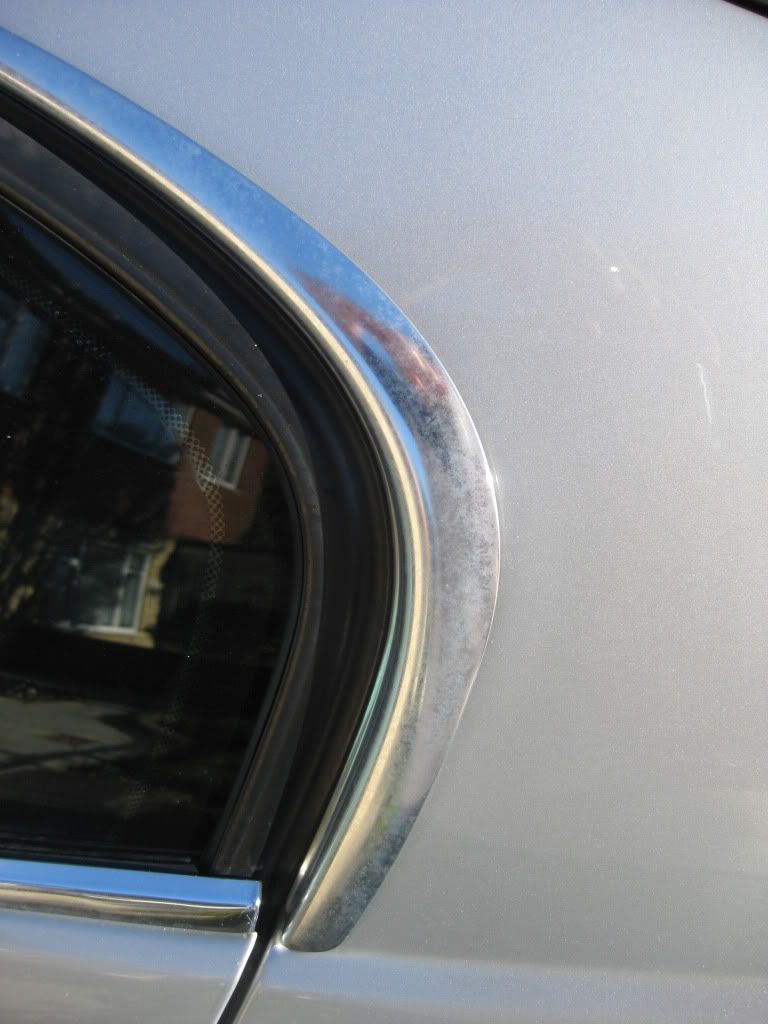
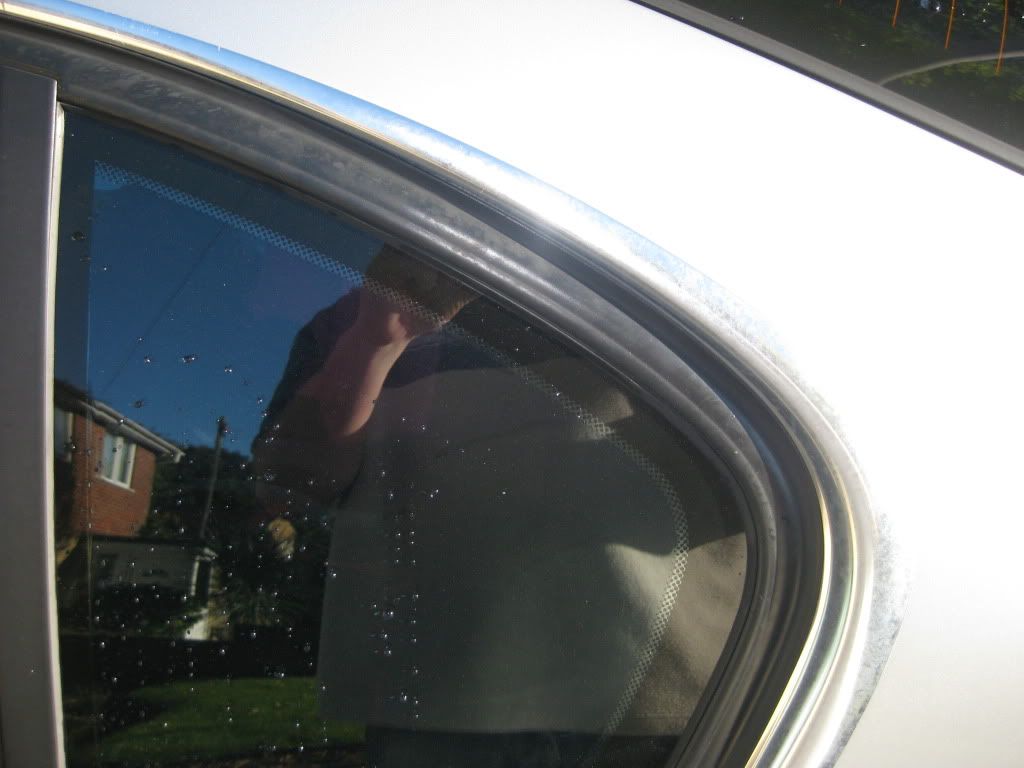
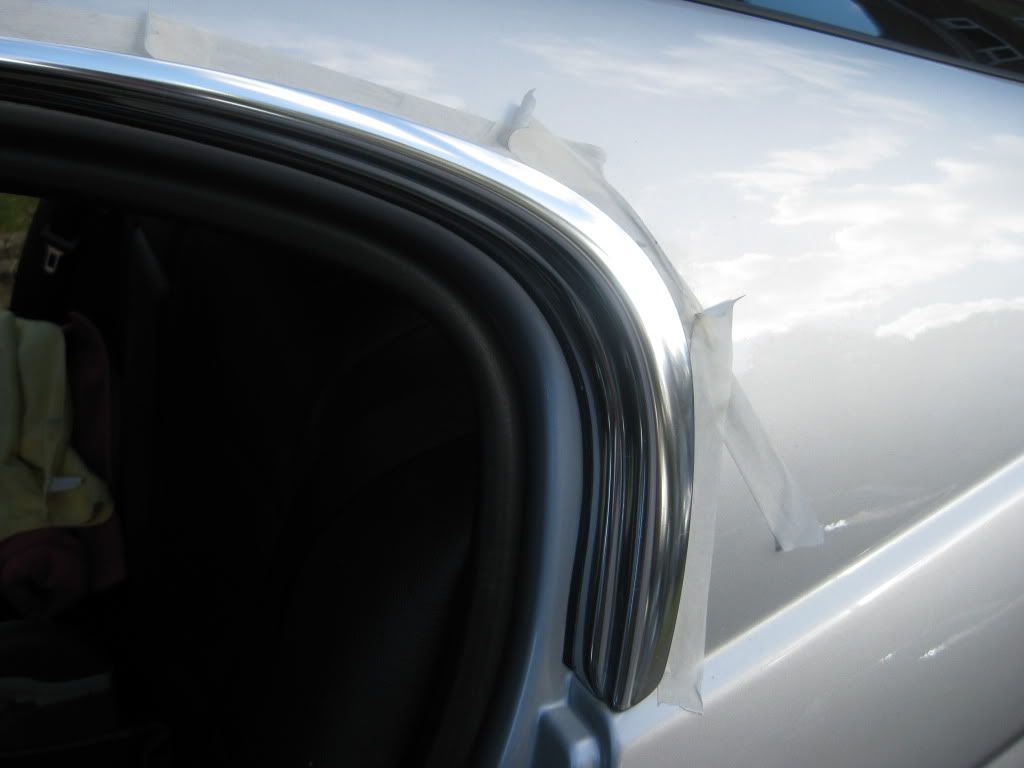
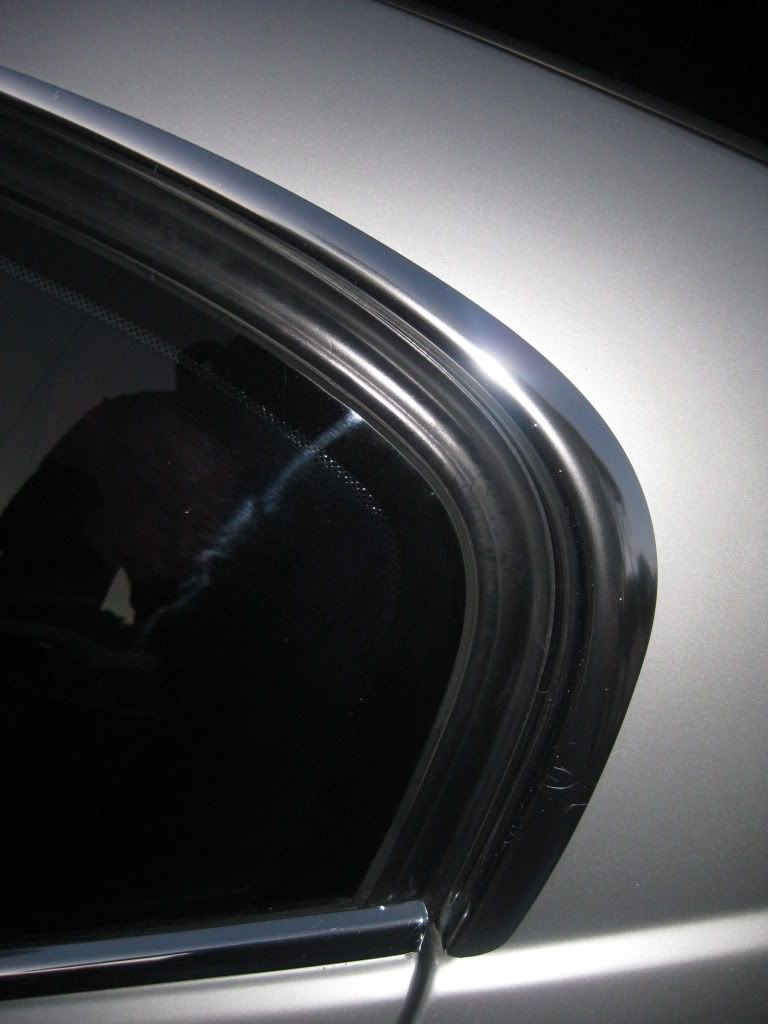
Before pics showing the stains on the chrome that nothing so far would shift:


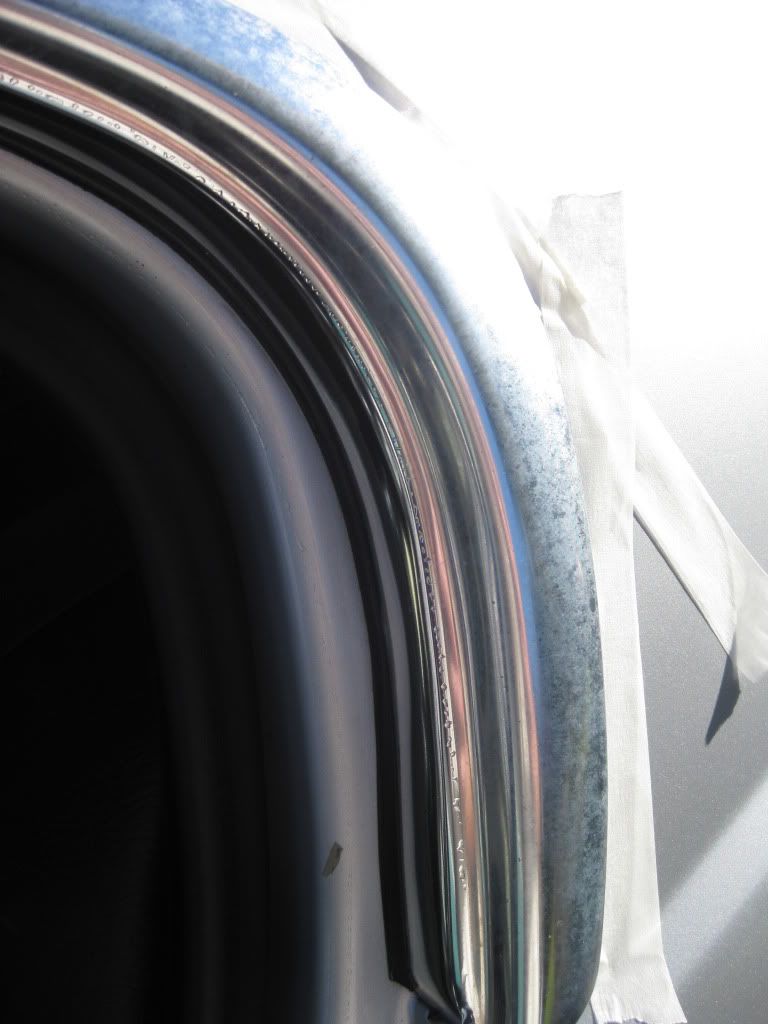
firstly tape up with 3m masking tape - this is important as you dont want to wire wool your paint work 


Again in this pic you can see how bad the staining is - I promise you this has been washed and dried. You can see the inside (left chrome that is normally protected by the door is quite shinny and the outside (right) doesnt even look like chrome due to the stains.


next i started with the graqde #0000. I gave it 2 goings over and to be honest it didnt make too much difference so taking a punt I went to the grade #00 wire wool that came in the kit and hey presto I had cutting action.

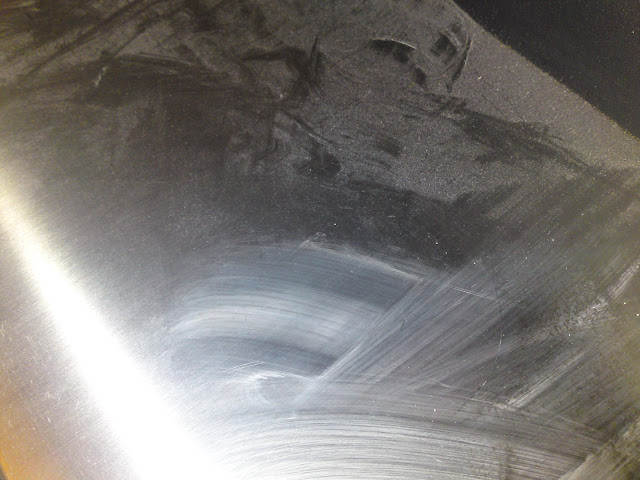
so, you need to give the green fluid bottle a very good shake to start and then you only need a minimal amount on the wire wool, it is very runny stuff so dont drench the wool. start by going over the chrome area with very little pressure and then just keep working at it. the cutting agent will not evaperate or disapear, you just need to keep working over the chrome, the worse the staining (mine is pretty awful) the more you work it. I spent 20 minutes working back and forth on my first pass to see how it came out. once you have done this leave it to dry and go a cloudy grey colour:


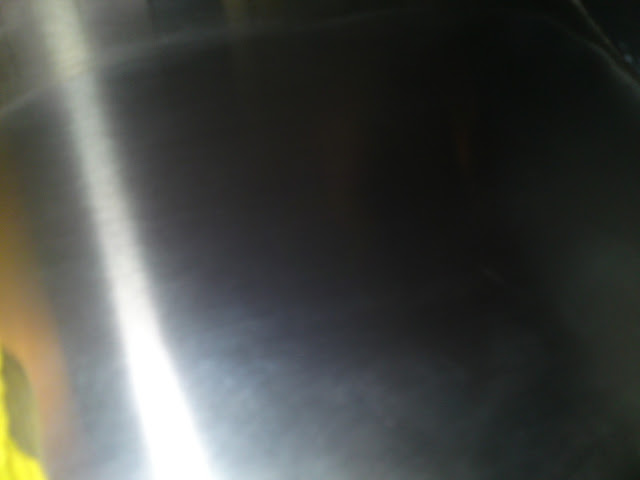
Once it has dried and gone chalky take the cloth provided and buff off to see the result. if you have a good finish then move to the finishing product, if not quite happy then give it another pass with the cutting product. I gave mine 2 passes with the cutter and then went on to the finishing sealer. I actually found that the sealer also got rid of the last tiny reminents of the stains. Apply with wire wool grade #00 and again let this dry to a chalky finish and then buff off. 

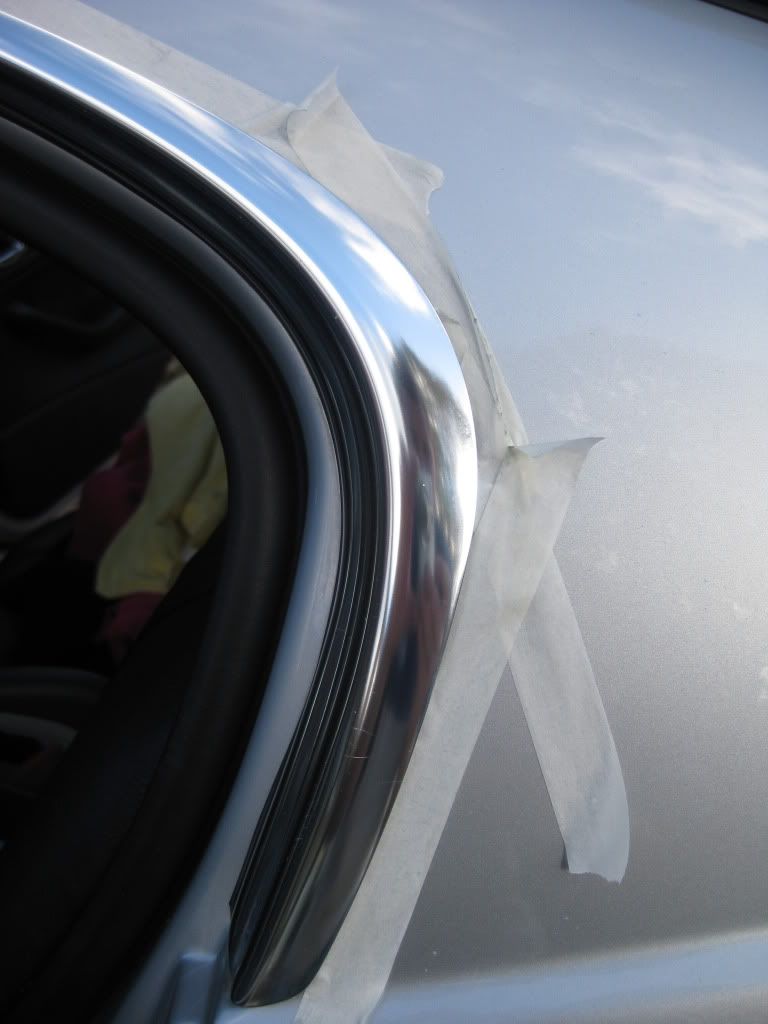
this was the finished product:


2. Này Mâm Xe 

  
5. Này Gương 
 
6. Này xe


7. Này chi tiết máy 
  
8. Này trống 
 
9. Này chi tiết máy 2 
 
10. Này máy công nghiệp 
 
11. Này thì container 
 
12. Chi tiết 1

PEŁNY OPIS AUTOSOL METAL POLISH 75 ML - NAJLEPSZA PASTA POLERSKA DO METALI

     
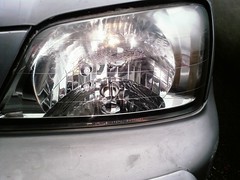
13. Chi Tiết 2: 
My Kembara headlights were badly faded and scratched. Went to Tesco and bought a tube of Autosol metal polish( Vì mình post link chưa được nên mọi người có thể search trên mạng hay youtube. chỉ cần gõ chữ autosol metal polish) for rm8. Used an old hard sponge to really rub it in. You really have to rub hard for about 10 minutes...a good workout! After that is will look hazy,but after a wipe with a wet cloth and some protective wax on top...the results are worth it. 
 
After A good polish with Autosol. Followed by some turtle wax. Much more clearer. I am happy with it!There are still some blurry areas,but I think a few more sessions will improve it. 
 
Tham khảo: 
[YOUTUBE][/YOUTUBE] 
Cách sử dụng: 
Kem đánh bóng kim loại Autosol - là sản phẩm số 1 của Đức, đã đoạt nhiều Huy chương Vàng và các giải thưởng Quốc Tế. 
Công dụng:
  • Làm sạch, đánh bóng và bảo vệ bề mặt kim loại.
  • Autosol có chứa nhôm oxit, là một tác nhân giúp bảo vệ bề mặt kim loại và hạn chế sự oxi hoá trở lại.
  • Không độc hại, an toàn với da tay và các vật dụng đựng thực phẩm.
  • Thân thiện với môi trường.
  • Không dễ cháy.
Sản phẩm:
  • Dạng kem: được sử dụng phổ biến và rộng rãi trên thế giới để làm sạch và đánh bóng các bề mặt kim loại như: crôm, nhôm, inox, đồng …
  • Dạng dung dịch: với các hạt mịn giúp tẩy sạch bụi bặm và các vết bẩn 1 cách dễ dàng và phục hồi sự sáng bóng cho bề mặt kim loại. Ngoài ra, còn bảo vệ, hạn chế sự oxi hoá trở lại. Dạng dung dịch nên sử dụng trên thép không gỉ, inox gương và có diện tích bề mặt rộng.
Ứng dụng: 
Autosol được sử dụng rộng rãi trong nhiều lĩnh vực khác nhau như:
  • Nhà hàng – khách sạn: cửa ra vào, thang máy, tay vịn cầu thang, vòi phun nước…
  • Trong công nghiệp: thích hợp dùng trong các máy đúc khuôn tiêm, khuôn thổi/ duỗi, hoặc đánh bóng các loại khuôn thổi chai PET.
  • Trong gia đình: đánh bóng các dụng cụ làm bếp bằng inox, tay nắm cửa, lư đồng, bồn rửa, vòi nước bằng inox, bếp lò, quạt trần …
  • Các thiết bị giải trí và thể thao bằng kim loại cũng có thể dễ dàng được làm sạch và đánh bóng bằng Autosol như: nhạc cụ, thiết bị hồ bơi, huy chương …
Hướng dẫn sử dụng:
  • Bôi 1 lớp mỏng Autosol lên vị trí / vật cần đánh bóng.
  • Lấy tay đánh nhẹ theo chiều kim đồng hồ.
  • Lấy vải khô đánh thật sạch các vết ố bẩn, bề mặt kim loại sẽ sáng bóng trở lại như mới.
Giá bán: 
60K 1 tuýp Metal Polish 75ml 
500K 1 lon Metal Polish 750ml

Autosol® was founded in Solingen, Germany in 1929. With almost 81 year’s experience, 3 manufacturing sites around the world and a global distribution network in more than 70 countries. In addition to the full range of car care products manufactured under the AUTOSOL® brand name, we manufacture several “Original BMW” products, sold at BMW dealerships throughout the world. Our products are used by BMW, Mercedes-Benz, Audi and Volkswagen at factories in Germany, and at the Ford factory in Spain. We also manufacture car care products for Toyota, Texaco and Shell.
To be chosen to supply car care products to the factories of both BMW and Mercedes-Benz is a unique and special privilege. This was possible only because of the superior and consistent quality of our products. We employ the leading chemists in Germany, and our manufacturing facilities are operated in accordance with the world’s most stringent quality control practices. Being true to our German heritage, we take special pride in ensuring the quality and craftsmanship of our products. Our company is founded on innovation, quality and a genuine passion for the beauty of a brilliant shine.
Several of our products have been awarded the prestigious Monde Selection gold medal by the International Institute of High Quality in Belgium. This worldwide competition includes products from 600 companies around the world. AUTOSOL® metal polish has won the gold medal three times, the maximum number allowable, after which it is distinguished as the “world’s finest.”
theo: ĐỨC THÀNH 3M SHOP - www.vatlieucongnghiep.com 


BĂNG KEO DÁN NỀN 471 -BĂNG KEO 3M

Băng keo 3M dán sàn 3M 471
Vàng, Đỏ, Xanh lá cây, Trắng
Đặc điểm:
- Dán dính tốt
- Sử dụng dể dàng hiệu quả.
- Nhanh chóng tiết kiệm
- Nhiều màu sắc để lực chọn
 Quy cách:
- 50mm x 34m

theo: ĐỨC THÀNH 3M SHOP - www.vatlieucongnghiep.com 

Băng keo 3M 4229P 10mmx10m - Băng keo cường lực dán đồ chơi xe hơi (Đỏ)

3M 4229P 10mmx10m - Băng keo cường lực dán đồ chơi xe hơi (Đỏ)

  • Băng keo cường lực dán đồ chơi xe hơi
  • Polyvinyl Chloride và cao su tổng hợp (PVC)
  • Sản xuất tại Mỹ
  • Không bảo hành
  • Xem thông tin chi tiết tại đây: TDS-3M4229-DucThanhshop

theo: ĐỨC THÀNH 3M SHOP - www.vatlieucongnghiep.com 


Hi-Strength 90 Spray Adhesive

Keo 3M - Hi-Strength 90, Keo xịt 3M dính cao
  • Lực dính cao
  • Chịu nhiệt
  • Kỹ thuật xịt úp ngược….
  • Lĩnh vực ứng dụng: Nội thất, công nghiệp gỗ, hàng hải, âm thanh,…
  • Màu: Trong
  • Trọng lượng: 17.6 oz

Keo dán dạng phun, dán được nhiều loại vật liệu: tấm mỏng trang trí, ván ép, gỗ, kim loại, xốp, bê tông, các loại nhựa (kể cả PE,PP)…
Hi-strength 90 dễ sử dụng, nhanh khô, độ dính cao, chịu nhiệt tốt giúp mối hàn bền vững duới tác động của môi trường.
Hi-strength 90 có 3 cấp độ phun giúp cho việc phủ keo dễ dàng, chính xác đồng thời có độ phủ cao giúp tiết kiệm chi phí.
  • 3M HI-STRENGTH 90:Rất mạnh, khô nhanh, liên kết tốt.
  • 3M Hi-Strength 90 Spray Adhesive rất lý tưởng cho việc liên kết những dát mỏng trang trí.
  • Keo dán dạng phun, dán được nhiều loại vật liệu: tấm mỏng trang trí, ván ép, gỗ, kim loại, xốp, bê tông, các loại nhựa (kể cả PE,PP)…
  • Hi-strength 90 dễ sử dụng, nhanh khô, độ dính cao, chịu nhiệt tốt giúp mối hàn bền vững duới tác động của môi trường.
  • Hi-strength 90 có 3 cấp độ phun giúp cho việc phủ keo dễ dàng, chính xác đồng thời có độ phủ cao giúp tiết kiệm chi phí.
Tài liệu:
http://multimedia.3m.com/mws/mediawebserver?mwsId=66666UuZjcFSLXTtlxTcOXTyEVuQEcuZgVs6EVs6E666666--&fn=HiStrength90_7870372.pdf
Hey guys this is Frank from rcFoamFighters I have decided to start a build thread for the SkyFighter v2. This thread is more for all of you who decide to build this plane. I will post all the basic stuff needed to do the build and then leave it open to anyone who wants to discuss and share their build experiences. Please feel free to post any pictures, video or questions related to this build. I will add more to this thread as time permits. For now please check out the videos, links and pictures listed below.
Quick build and first test flights:
rcFoamFighters Sky Fighter ver2 (Fast RC Plane) (9 min 6 sec)
 
Plane Dialed in and First Radar Speed Clocks (94mph) with 2212/6 suppo brushless motor, 
30amp Suppo brushless ESC, APC 6" x 4" Prop and Rhino 1350 30c 3s1p LiPo Battery
SkyFighter v2 Test Flights & 94MPH Radar Speed Clocks (7 min 21 sec)
 
Versatility Testing with 2 cell setup and slow flyer prop more Radar Speed Clocks with 3 cell setup and APC 5.5" x 5.5" prop 
Includes High Speed Crash and Damage assessment.
SkyFighter v2 Versatility testing and Crash (8 min 44 sec)
 
rcFoamFighters FREE TEMPLATES & PLANS DOWNLOAD Link:
Below are pictures of the SkyFighter v2 I built without any PDF templates or plans. Dimensions
were taken from this plane and given to my brother Paul to draw them up in AutoCAD and then convert them into a tiled PDF template.
Attached Thumbnails
  • Name: DSCF2359.jpg Views: 518 Size: 73.2 KB Description: Cut out the center fuselage-wing piece after drawing it onto the EPP foam. All the EPP Parts to this plane can be cut from (1) sheet of 24" X 36" x 15mm EPP Cut out the center fuselage-wing piece after drawing it onto the EPP foam. All the EPP Parts to this plane can be cut from (1) sheet of 24" X 36" x 15mm EPP 73.2 KB · Views: 518
  • Name: DSCF2362.jpg Views: 357 Size: 59.7 KB Description: Center fuselage-wing piece completely cut out. Center fuselage-wing piece completely cut out. 59.7 KB · Views: 357
  • Name: DSCF2363.jpg Views: 380 Size: 58.8 KB Description: Lines are for the wing bevels and placement of the upper and lower fuselage pieces also seen is the centerline used to make sure all measurements are squared and true. Lines are for the wing bevels and placement of the upper and lower fuselage pieces also seen is the centerline used to make sure all measurements are squared and true. 58.8 KB · Views: 380
  • Name: DSCF2369.jpg Views: 322 Size: 65.1 KB Description: Cut two 3' wide strips of 15mm EPP to make the upper and lower fuselage pieces. Cut two 3' wide strips of 15mm EPP to make the upper and lower fuselage pieces. 65.1 KB · Views: 322
  • Name: DSCF2371.jpg Views: 340 Size: 61.3 KB Description: All of the EPP pieces cut out. upper and lower fuselage pieces along with the center fuselage-wing piece. All of the EPP pieces cut out. upper and lower fuselage pieces along with the center fuselage-wing piece. 61.3 KB · Views: 340
  • Name: DSCF2372.jpg Views: 402 Size: 75.7 KB Description: Trial fit upper and lower fuselage pieces to the center fuselage-wing piece. Trial fit upper and lower fuselage pieces to the center fuselage-wing piece. 75.7 KB · Views: 402
  • Name: DSCF2374.jpg Views: 416 Size: 53.3 KB Description: Bevel all wing edges completely with hand held hotwire then shape with sanding blocks. Glue 18" wood spar in to bottom of wing. Carbon fiber or wood will work. Bevel all wing edges completely with hand held hotwire then shape with sanding blocks. Glue 18" wood spar in to bottom of wing. Carbon fiber or wood will work. 53.3 KB · Views: 416
  • Name: DSCF2378.jpg Views: 429 Size: 61.2 KB Description: Glue plastic inline motor mount into the top side of center fuselage wing piece. Any stick mount will work but motor shaft should be centered on wing for best performance. Trial fit before gluing Glue plastic inline motor mount into the top side of center fuselage wing piece. Any stick mount will work but motor shaft should be centered on wing for best performance. Trial fit before gluing 61.2 KB · Views: 429
  • Name: DSCF2384.jpg Views: 493 Size: 86.0 KB Description: Tack down the first layer of henrys style fiberglass weave with hot glue gun. Only tack enough to hold in place. Tack down the first layer of henrys style fiberglass weave with hot glue gun. Only tack enough to hold in place. 86.0 KB · Views: 493
  • Name: DSCF2385.jpg Views: 393 Size: 79.4 KB Description: When Top side of center fuselage-wing completely tacked on trim weave with scissors to about 1/2" short of edges. When Top side of center fuselage-wing completely tacked on trim weave with scissors to about 1/2" short of edges. 79.4 KB · Views: 393
  • Name: DSCF2387.jpg Views: 409 Size: 74.3 KB Description: Tack on first layer of weave to the bottom side of the center fuselage-wing the same way the top side was done. Tack on first layer of weave to the bottom side of the center fuselage-wing the same way the top side was done. 74.3 KB · Views: 409
  • Name: DSCF2390.jpg Views: 395 Size: 96.1 KB Description: When ready to spray with 3M 90 high strength adhesive be sure to work on flat surface so wing will stay flat. When ready to spray with 3M 90 high strength adhesive be sure to work on flat surface so wing will stay flat. 96.1 KB · Views: 395
  • Name: DSCF2392.jpg Views: 399 Size: 97.7 KB Description: Spray top side of center fuselage-wing piece with adhesive and quickly spread with puddy knife. do small sections at a time or glue may dry to fast and clump up on the surface. Spray top side of center fuselage-wing piece with adhesive and quickly spread with puddy knife. do small sections at a time or glue may dry to fast and clump up on the surface. 97.7 KB · Views: 399
  • Name: DSCF2393.jpg Views: 365 Size: 101.3 KB Description: When the top side is dry and not tacky flip over and repeat proccess on the bottom side of the center fuselage-wing piece. Spraying with adhesive and spreading with puddy knife. When the top side is dry and not tacky flip over and repeat proccess on the bottom side of the center fuselage-wing piece. Spraying with adhesive and spreading with puddy knife. 101.3 KB · Views: 365
  • Name: DSCF2400.jpg Views: 394 Size: 137.4 KB Description: When dry apply second layer of weave in a cross pattern. This will completely stiffen the wing and make the plane Bullet Proof. Repeat Spray adhesive proccess same as before. When dry apply second layer of weave in a cross pattern. This will completely stiffen the wing and make the plane Bullet Proof. Repeat Spray adhesive proccess same as before. 137.4 KB · Views: 394
  • Name: DSCF2401.jpg Views: 466 Size: 59.1 KB Description: Bevel all edges of upper fuselage with hotwire cutter , handheld hotwire cutter, or razor knife.Then round edges with sanding blocks. Bevel all edges of upper fuselage with hotwire cutter , handheld hotwire cutter, or razor knife.Then round edges with sanding blocks. 59.1 KB · Views: 466
  • Name: DSCF2402.jpg Views: 381 Size: 90.8 KB Description: Bevel sand and shape the lower fuselage piece the same way the upper piece was done. Bevel sand and shape the lower fuselage piece the same way the upper piece was done.90.8 KB · Views: 381
  • Name: DSCF2407.jpg Views: 412 Size: 62.5 KB Description: Glue upper and lower fuselage pieces to center fuselage-wing piece using either 3m 90 spray adhesive, hot glue, or 5 minute epoxy. Do on flat surface and place weighted board on top to make sure everything dries flat. Glue upper and lower fuselage pieces to center fuselage-wing piece using either 3m 90 spray adhesive, hot glue, or 5 minute epoxy. Do on flat surface and place weighted board on top to make sure everything dries flat. 62.5 KB · Views: 412
  • Name: DSCF2414.jpg Views: 462 Size: 62.1 KB Description: Test fit motor for correct alignment. Should be level and centered on wing and parallel with fuselage center line. Test fit motor for correct alignment. Should be level and centered on wing and parallel with fuselage center line. 62.1 KB · Views: 462
  • Name: DSCF2415.jpg Views: 364 Size: 61.0 KB Description: Tape all wing edges with strapping tape to strengthen where fiberglass weave does not cover. 3M scotch cross weaved strapping tape is preferred. Much lighter and stronger. Tape all wing edges with strapping tape to strengthen where fiberglass weave does not cover. 3M scotch cross weaved strapping tape is preferred. Much lighter and stronger. 61.0 KB · Views: 364
  • Name: DSCF2419.jpg Views: 399 Size: 54.7 KB Description: Cut two 12 3/4" X 3" pieces of 1/8" thick balsa wood for elevons. Can be cut with razor knife as well. Cut two 12 3/4" X 3" pieces of 1/8" thick balsa wood for elevons. Can be cut with razor knife as well. 54.7 KB · Views: 399
  • Name: DSCF2421.jpg Views: 354 Size: 61.8 KB Description: Cut out elevon pieces using template and razor knife. Use a strait edge ruler as a guide to get nice strait cuts. Cut out elevon pieces using template and razor knife. Use a strait edge ruler as a guide to get nice strait cuts. 61.8 KB · Views: 354
  • Name: DSCF2424.jpg Views: 387 Size: 68.0 KB Description: Lightly sand all edges smooth after cutting out elevons. Lightly sand all edges smooth after cutting out elevons. 68.0 KB · Views: 387
  • Name: DSCF2431.jpg Views: 414 Size: 87.6 KB Description: Bevel the hinge side of both elevons before hinging to wing. Bevel the hinge side of both elevons before hinging to wing. 87.6 KB · Views: 414
  • Name: DSCF2440.jpg Views: 454 Size: 80.8 KB Description: Use the over and under tape method to hinge elevons to wing. This provides the best possible slop free hinge. Use the over and under tape method to hinge elevons to wing. This provides the best possible slop free hinge. 80.8 KB · Views: 454
  • Name: DSCF2444.jpg Views: 435 Size: 74.5 KB Description: Both elevons completely hinged to wing. Hand test, movement should be bind free with no slop. Both elevons completely hinged to wing. Hand test, movement should be bind free with no slop. 74.5 KB · Views: 435
  • Name: DSCF2450.jpg Views: 432 Size: 98.8 KB Description: Mark servo slots per template. It's best to lay the servos on the wing and draw around them with a pen. They should be against fuselage and parallel to centerline per template placement. Mark servo slots per template. It's best to lay the servos on the wing and draw around them with a pen. They should be against fuselage and parallel to centerline per template placement. 98.8 KB · Views: 432
  • Name: DSCF2452.jpg Views: 385 Size: 151.8 KB Description: Use razor knife to cut through fiberglass weave then remove cut out weave piece. Use hot knife to cut slot for servos. Do not go all the way through to bottom. Slot should be just deep enough for servos to be flush with the top of wing. Use razor knife to cut through fiberglass weave then remove cut out weave piece. Use hot knife to cut slot for servos. Do not go all the way through to bottom. Slot should be just deep enough for servos to be flush with the top of wing. 151.8 KB · Views: 385
  • Name: DSCF2461.jpg Views: 454 Size: 125.7 KB Description: Test fit servos, control rods and control horns. Control rods should be parallel to centerline. Both control horns should measure the same distance back from hinge line. Servo arms should be centered with radio on. Test fit servos, control rods and control horns. Control rods should be parallel to centerline. Both control horns should measure the same distance back from hinge line. Servo arms should be centered with radio on. 125.7 KB · Views: 454
  • Name: DSCF2462.jpg Views: 484 Size: 86.6 KB Description: With radio on and control rods and control horns attached make sure servo arms are centered. After everything is correct hot glue servos in place. They should be flush with top of wing. With radio on and control rods and control horns attached make sure servo arms are centered. After everything is correct hot glue servos in place. They should be flush with top of wing. 86.6 KB · Views: 484
  • Name: DSCF2464.jpg Views: 473 Size: 96.3 KB Description: Tape top of servos with cross weaved straping tape. Cut receiver slot in top fuselage piece per template. Can use hot knife or razor knife. Tape top of servos with cross weaved straping tape. Cut receiver slot in top fuselage piece per template. Can use hot knife or razor knife. 96.3 KB · Views: 473
  • Name: DSCF2466.jpg Views: 413 Size: 69.7 KB Description: Fit balsawood hatch cover to top fuselage piece. Hinge front of hatch cover with cross weave straping tape. Fit balsawood hatch cover to top fuselage piece. Hinge front of hatch cover with cross weave straping tape. 69.7 KB · Views: 413
  • Name: DSCF2469.jpg Views: 524 Size: 81.0 KB Description: Cut battery slot through top fuselage piece and center fuselage-wing piece. Use hot knife or razor knife. Cut battery slot through top fuselage piece and center fuselage-wing piece. Use hot knife or razor knife. 81.0 KB · Views: 524
  • Name: DSCF2476.jpg Views: 421 Size: 74.4 KB Description: Trial fit battery into slot. Battery should fit snuggly. Slot is over sized to allow adjustment of the planes CG. Trial fit battery into slot. Battery should fit snuggly. Slot is over sized to allow adjustment of the planes CG. 74.4 KB · Views: 421
  • Name: DSCF2479.jpg Views: 486 Size: 140.3 KB Description: Cut slots for ESC and wiring to motor into top fuselage piece. Cut just deep enough so everything fits flush at the top. Cut slots for ESC and wiring to motor into top fuselage piece. Cut just deep enough so everything fits flush at the top. 140.3 KB · Views: 486
  • Name: DSCF2480.jpg Views: 487 Size: 73.4 KB Description: Apply cross weave strapping tape along seam where top and bottom fuselage meet  the center fuselage-wing. Bottom fuselage should be completely covered to protect when landing. Apply cross weave strapping tape along seam where top and bottom fuselage meet the center fuselage-wing. Bottom fuselage should be completely covered to protect when landing. 73.4 KB · Views: 487
  • Name: DSCF2485.jpg Views: 559 Size: 73.9 KB Description: Apply cross weave strapping tape to nose section of plane. Then cut plastic canopy to fit and attach with cross weave strapping tape. Glue rear stabilizers in place per template. Apply cross weave strapping tape to nose section of plane. Then cut plastic canopy to fit and attach with cross weave strapping tape. Glue rear stabilizers in place per template. 73.9 KB · Views: 559
  • Name: DSCF2486.jpg Views: 490 Size: 58.0 KB Description: Cover plane with desired color sealing tape, Trim Monokote or Monokote. Cover plane with desired color sealing tape, Trim Monokote or Monokote. 58.0 KB · Views: 490
  • Name: DSCF2495.jpg Views: 427 Size: 57.1 KB Description: Because of the speeds this plane is capable of it is not recommended to use just one color. Color variation will help tell the orientation of the plane in flight Because of the speeds this plane is capable of it is not recommended to use just one color. Color variation will help tell the orientation of the plane in flight 57.1 KB · Views: 427
  • Name: DSCF2500.jpg Views: 431 Size: 50.1 KB Description: I usually make one sided of the plane dark color and the other side very bright. The bottom of the plane is black with black and white checker board invasion stripes. I usually make one sided of the plane dark color and the other side very bright. The bottom of the plane is black with black and white checker board invasion stripes. 50.1 KB · Views: 431
  • Name: DSCF2505.jpg Views: 417 Size: 56.5 KB Description: The top of the plane is covered in day glow orange with black trim. The rear stabilizers are black and white to give more variation in color. The top of the plane is covered in day glow orange with black trim. The rear stabilizers are black and white to give more variation in color. 56.5 KB · Views: 417
  • Name: DSCF2507.jpg Views: 694 Size: 64.0 KB Description: Finished plane on balancer. CG is 14 3/8" from the tip of the nose back. Finished plane on balancer. CG is 14 3/8" from the tip of the nose back. 64.0 KB · Views: 694
  • Name: DSCF2511.jpg Views: 479 Size: 57.1 KB Description: Finished plane top view Finished plane top view 57.1 KB · Views: 479
  • Name: DSCF2516.jpg Views: 544 Size: 58.0 KB Description: Finished plane three quarter view. Finished plane three quarter view. 58.0 KB · Views: 544

Unordered List

Sample Text

Blog Archive

www.vatlieucongnghiep.com. Được tạo bởi Blogger.

Popular Posts

Recent Posts

Text Widget